Voucher registration – from inbox to posting
See how a voucher moves from the inbox to posting, and get to know the voucher's five sections.
The inbox — where voucher registration begins
Voucher registration starts in the inbox, where you find all vouchers that have not yet been posted. Vouchers can arrive here from several sources:
PDF invoices you have uploaded or received via email
Electronic invoice files from Sproom or directly from suppliers
Receipts received via the EG Xena Bilag app
Select from the menu Finance > Voucher registration.
You can navigate quickly through the voucher using keyboard shortcuts specially tailored to voucher registration. You can, for example, press Alt+A to quickly go from an open voucher back to the inbox.
➡️ See the overview of keyboard shortcuts
Send a voucher directly via email
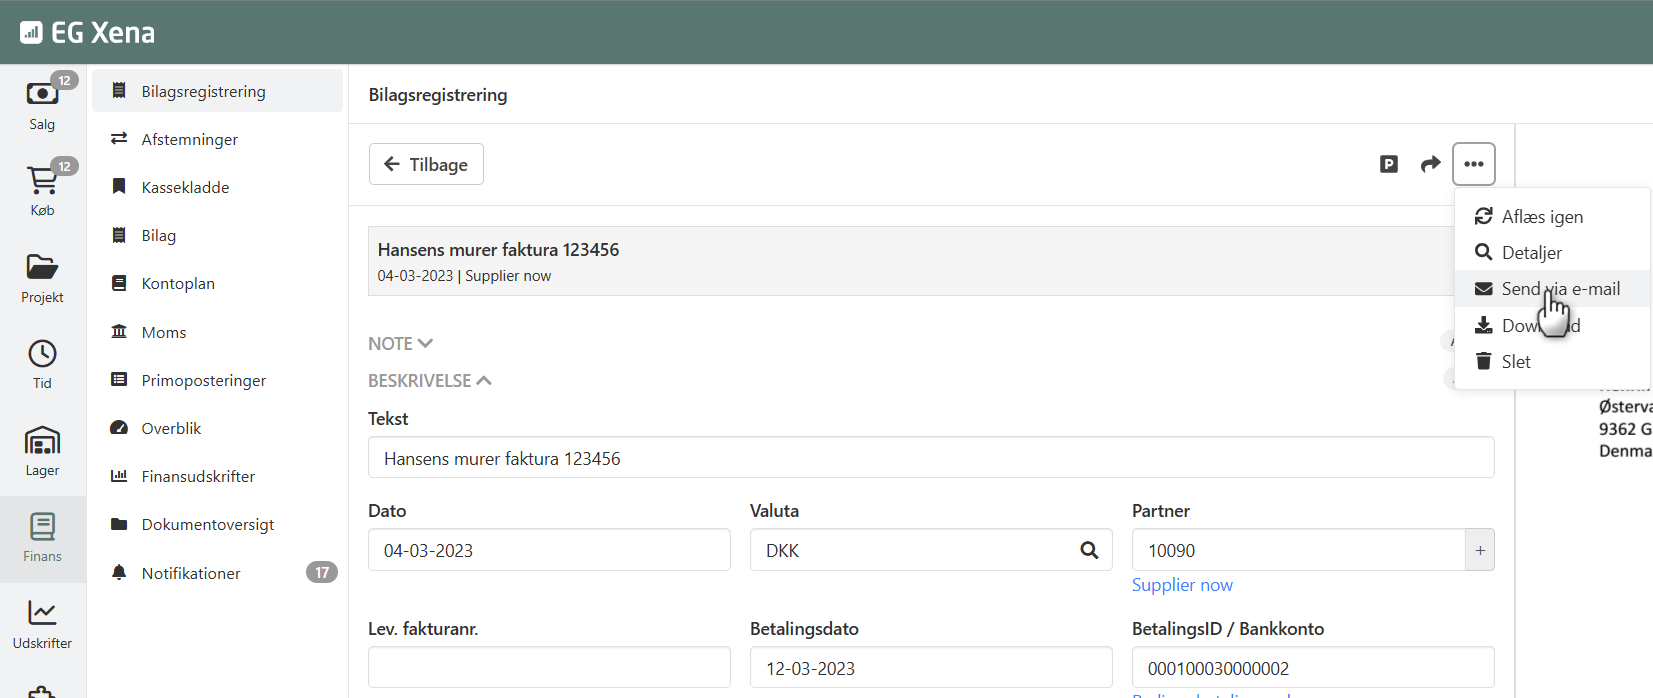
You can send a voucher directly via email, without first having to download and re-upload the file. The function is available both in the voucher list and in the individual voucher view via the menu (the three dots).
Click the three dots and select Send via email. The email opens with the voucher attached and ready for you to fill in the recipient and message.
💡 The subject field is automatically filled with the document's description when you send via email. You can always change the subject yourself before sending.
Posting and approval
If you have posting rights, you can register and post the voucher directly. If not, you can fill in information and forward it for approval to a colleague. Approval rules can also be set up that automatically forward vouchers to another user's inbox if you do not have access to approve all of it.
➡️ Guide to setting up approval rules
When the voucher is posted, it is assigned a voucher number based on the journal and the user carrying out the posting. Journals are created via Setup > Finance setup > Journals.
➡️ See how to set up number series and select a journal on a user
The voucher's five sections
A voucher in Xena is divided into five logical sections, described below.
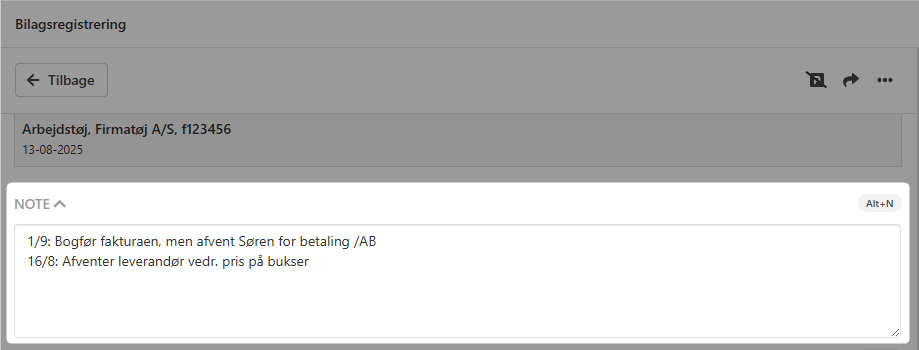
1: Notes
This section is used for internal notes about the voucher. The notes are saved together with the partner entry when posting and are also shown under Purchase > Payments.
➡️ Read more about notes and parking vouchers
2: Description
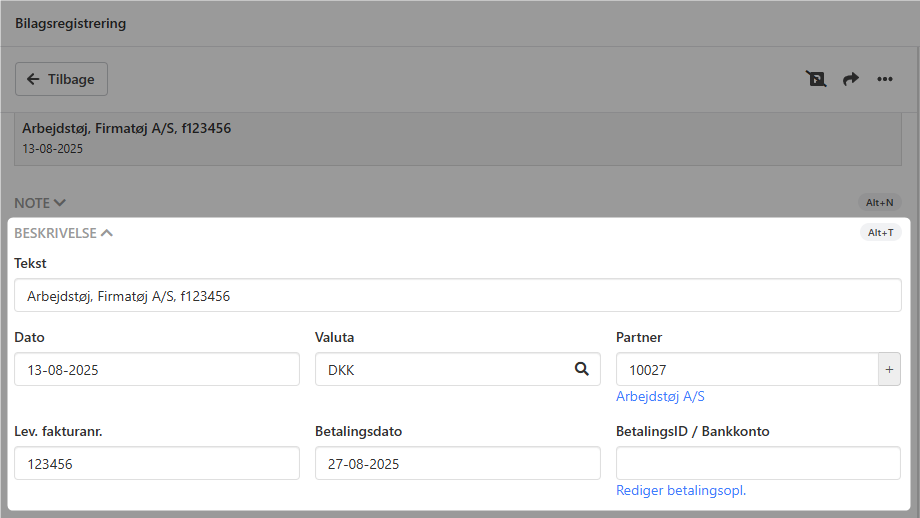
Here you find the basic information about the voucher. Xena automatically reads many of these when the voucher is received. The top text line acts as the default description on subsequent posting lines. It is therefore recommended to write a clear and comprehensive text, which is also saved and can be used for searching later.
➡️ See also: Document management
💡 If Xena recognizes the supplier on the voucher, the top text line is automatically filled with the supplier name and invoice number, e.g. Øldepotet Haraldskær - 111, instead of the file name. If there is no invoice number, only the supplier name is used. If the supplier is not recognized at all, the file name is used as before. You can always edit the text afterwards.
Supplier information: If the supplier has not been created, you can quickly create it via the +-button in the Partner field. Even for cash vouchers, e.g. from a café or bakery, it is recommended to create the supplier. When a supplier is selected, additional fields appear for invoice number, payment date, and payment ID/bank account – important information if you later export payments for import into your bank.
When creating suppliers, be aware of the following:
Always enter the CVR/Brreg number, so Xena can recognize the supplier
Avoid using the same CVR/Brreg number on multiple suppliers
Remove the CVR/Brreg number before deactivating a supplier
3: Order cost
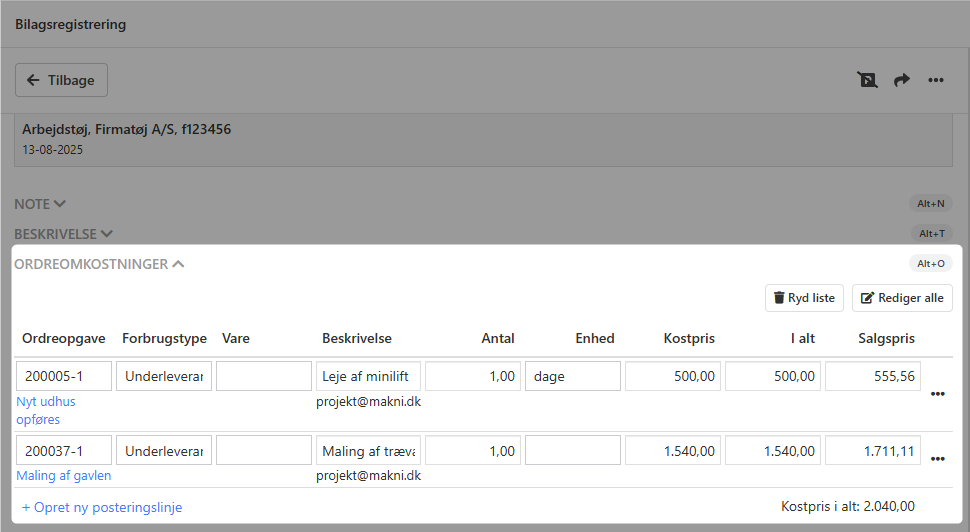
Here you can add expense lines to sales orders. This section is only shown if at least one project has been created in your company.
➡️ Tasks are shown depending on whether they are set up to be shown in posting
Use the buttons Edit all and Clear list to change or remove the voucher's order costs collectively.
➡️ Voucher registration to sales orders and approval flow
➡️ Creating order costs via electronic invoice
4: Posting
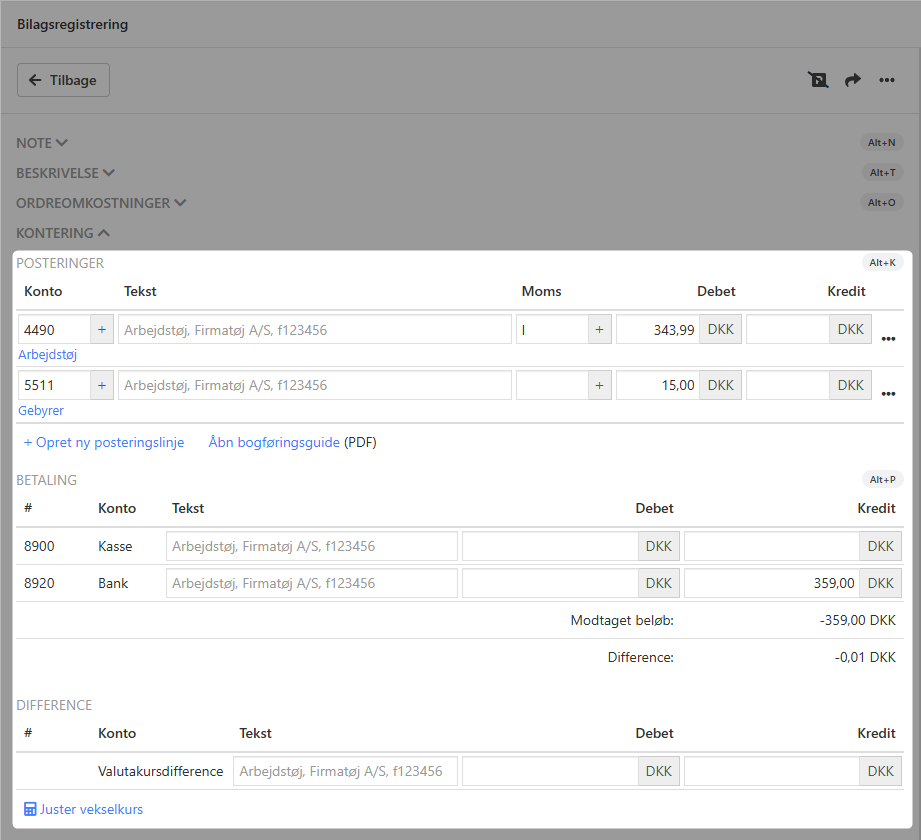
In this section, you choose how the voucher is posted:
Select finance account
Enter amount (incl. VAT)
Add a description if needed
If you often post vouchers from the same supplier to the same account, you can select the field Save the posting details on the partner for next time, so Xena remembers the setup.
If you are missing a finance account in the search, check whether you have entered an account number or a SAF-T number on the account. In voucher registration and the cash journal, only accounts with either an account number or a SAF-T account number filled in are shown.
➡️ Read more about the chart of accounts
Already paid? If the invoice has already been paid, click the amount field next to the payment account – the system automatically inserts the amount. For partial payment, you can adjust the amount, and the remaining amount is registered as a supplier balance. The posting date for the payment is taken from the payment date in the Description section if specified – otherwise the voucher date is used.
Handling foreign currency: For foreign invoices, you can adjust for exchange rate differences:
Enter the actual amount paid on the payment account
Click Adjust exchange rate
Xena automatically adjusts the invoice amount
5: Result
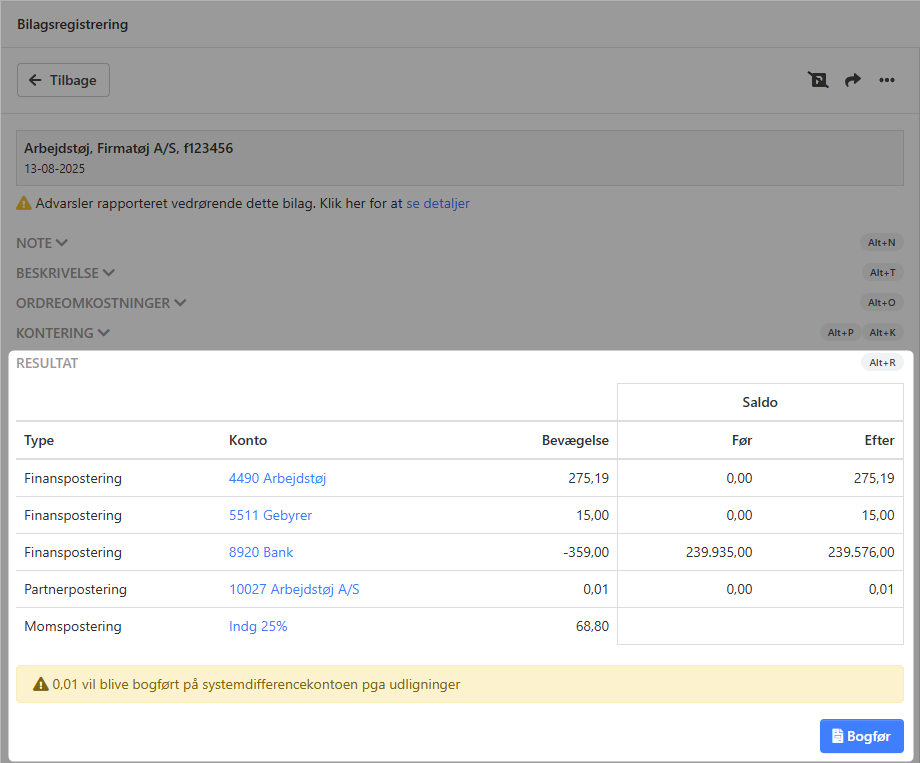
This section gives a combined overview of the posting result, as well as the before/after balance for the selected accounts. Differences of up to DKK 0.49 are treated as roundings and are automatically posted to the System difference account. This section also shows errors (red) and warnings (yellow). Vouchers with warnings can still be posted but should be reviewed.
⚠️ Note: Only users with posting rights can see the balance before and after posting in the Result section. It is also only these users who have access to the link to open the accounts directly from here.
When everything is ready, click the Post button. Vouchers that require further approval are automatically forwarded to the relevant user.
- Updated