Voucher registration – electronic purchase invoices
In Voucher registration, you can quickly and efficiently post all lines from electronic invoices to orders.
General
The guide Voucher registration describes how an invoice can be posted to either a partner or finance. This guide focuses specifically on how the individual lines from an electronic invoice can be transferred to a purchase order and/or a sales order.
When you open an electronic invoice, all received data from the file is shown. It is important to note the following:
Price/unit: The price per unit after discount.
Discount: Discount percentage (e.g. 25%) or as an amount (e.g. DKK 140.25).
Total: The total price for the item after the discount.
⚠️ If the supplier has attached the original invoice to the electronic file, you can view it by browsing to the next page. This can help if there are details that were not included in the file but can be seen on the original invoice.
Step 1: Start transfer
To transfer data from the electronic invoice:
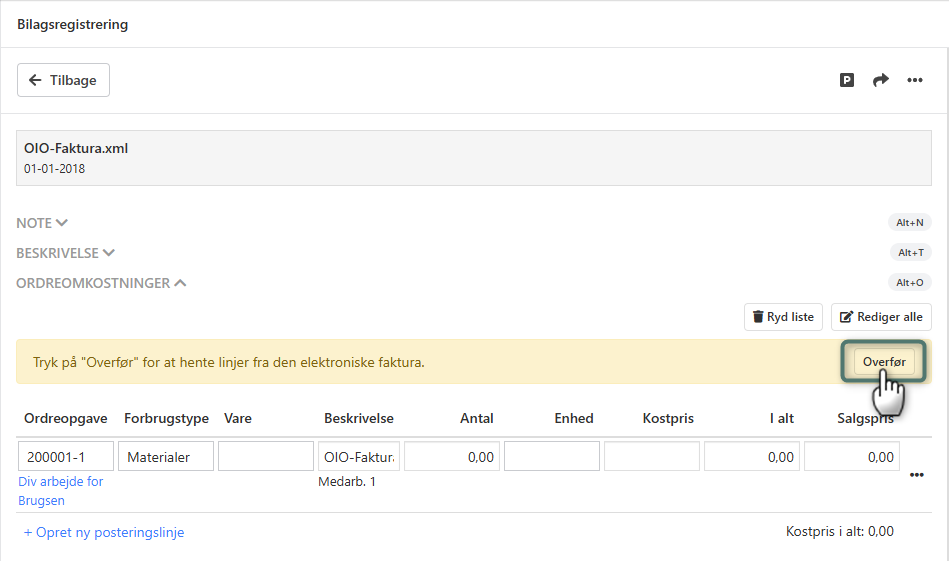
Click the Transfer link in the Order costs section.
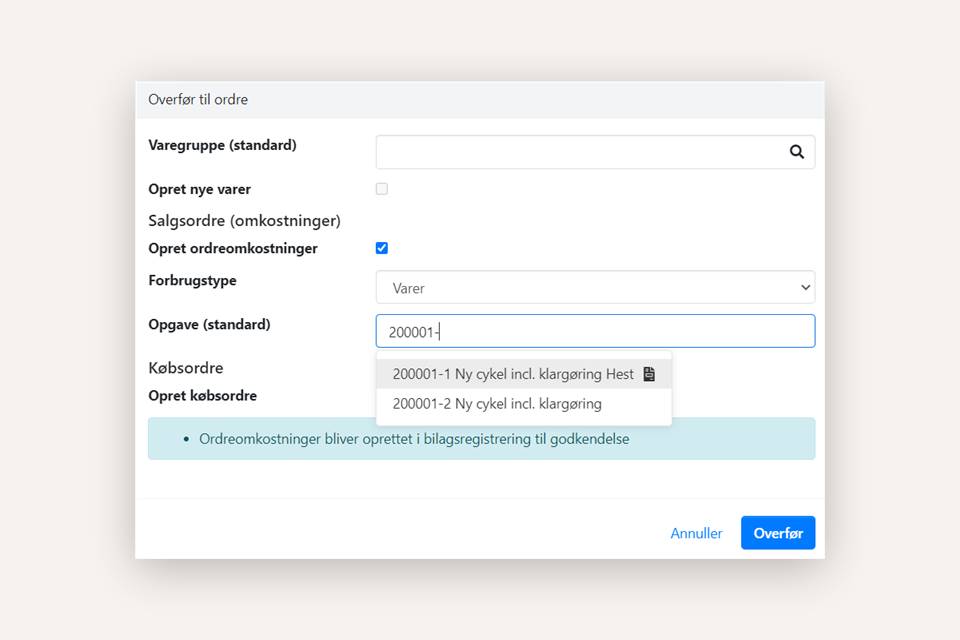
If a task number was identified during import, it will be suggested automatically.
⚠️Note: If the Transfer button is inactive, this is because cost lines have already been created on the voucher. To activate the button, existing lines must be deleted by pressing Clear list.
⚠️ Note: If the Transfer button is not shown at all, and you have access to the Project menu, this may be due to outdated data in the browser's cache or cookies. Clear cookies and other website data, and reload the page.
➡️ Read more about how to clear cookies and website data
Step 2: Choose transfer method
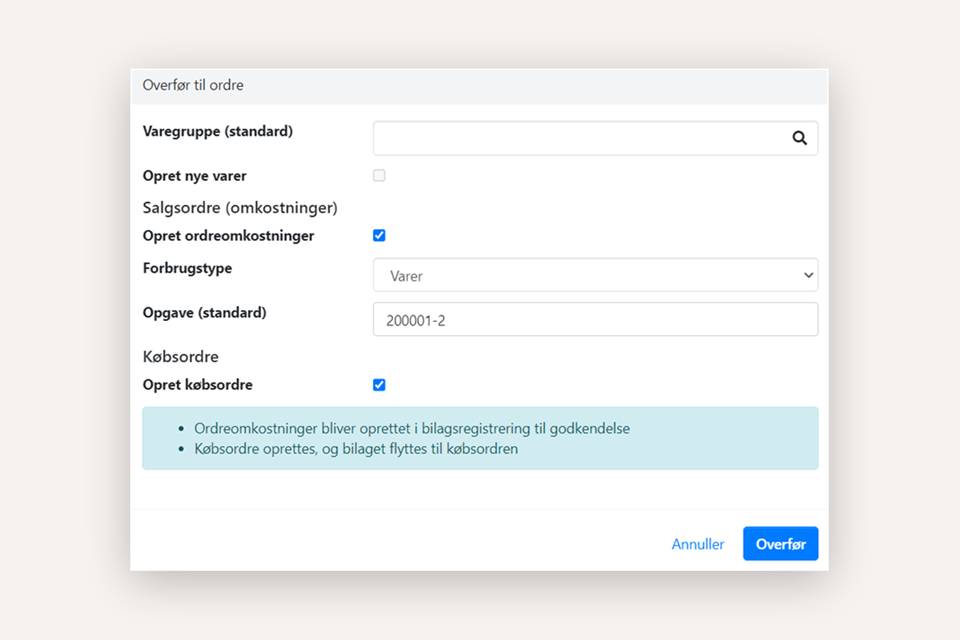
In the dialog box shown, you make choices depending on which data you want to create or transfer. You can combine the different steps as needed.
2.A: Transfer cost to a sales order
Select the field Create order costs.
Select a cost type. If a default cost type is defined on the supplier, it will be suggested.
Select the task. Any task no. from the invoice is suggested automatically
Press Transfer.
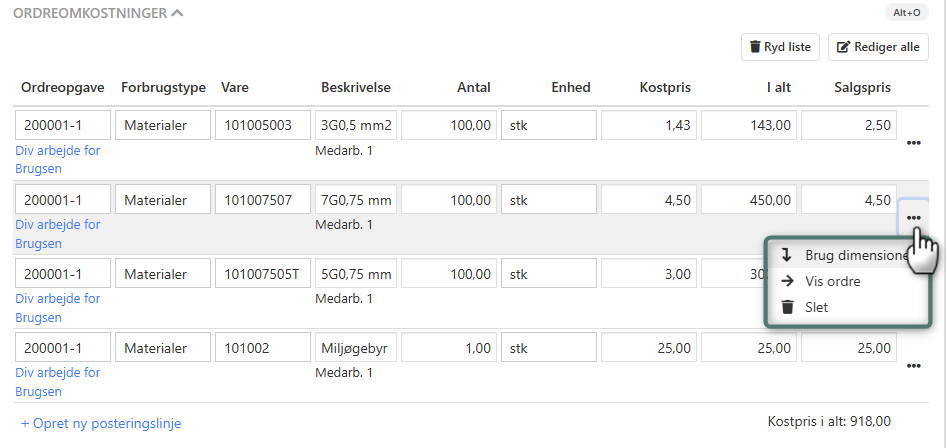
All lines will now be added in the Order costs section. If it is subsequently necessary to change the cost type or task number on several lines, this can be done collectively by pressing Edit all.
Approval process:
If it is required that an order responsible approves costs, you now have 2 options:
Press Send for approval: The voucher is automatically moved to the first order responsible who is to approve order costs. Once all order costs have been approved, the voucher is sent to the inbox selected under Setup > Finance setup > Approval rules > Settings, for final finance posting.
Press Post: The voucher is posted to finance, and then moved to the first order responsible who is to approve order costs.
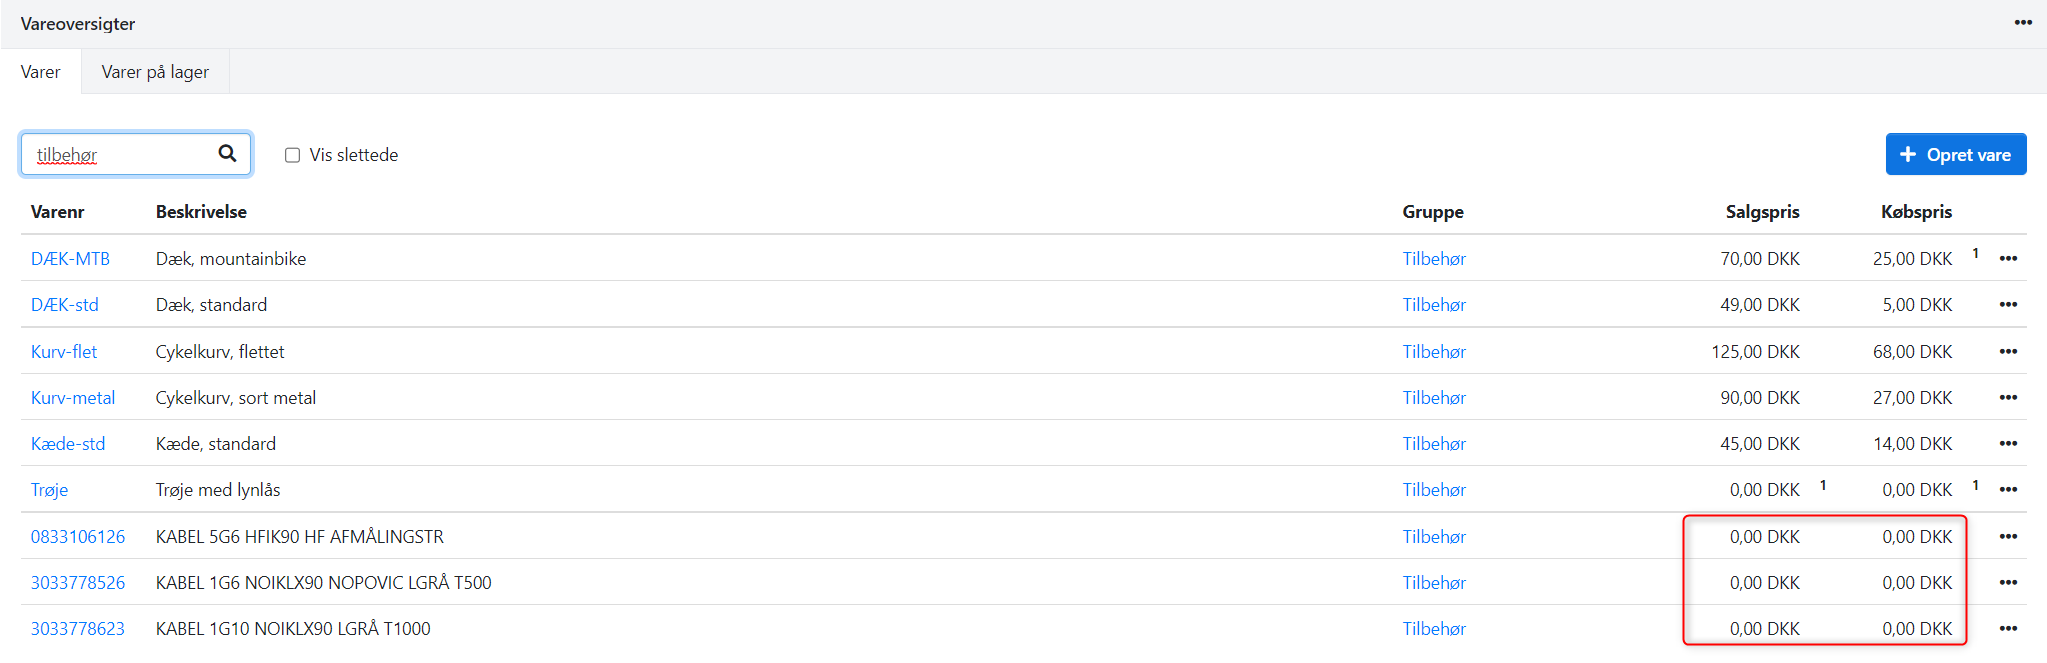
2.B: Creating new items during transfer
If new items need to be created in the item register during the transfer:
Select the relevant item group.
Select the field Create new items.
Press Transfer
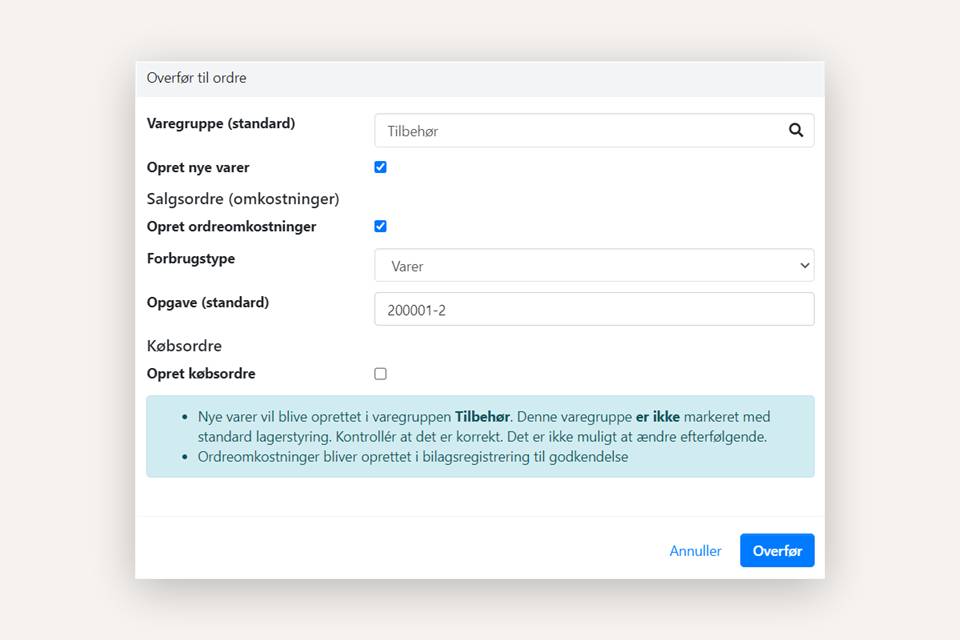
Important: The newly created items will not have a predefined cost or sales price. These must be added manually afterwards.
2.C: Move invoice to a purchase order
If you use inventory management (an add-on in the Xena Appstore), the invoice can be moved to a purchase order:
Select the field Create purchase order
Press Transfer
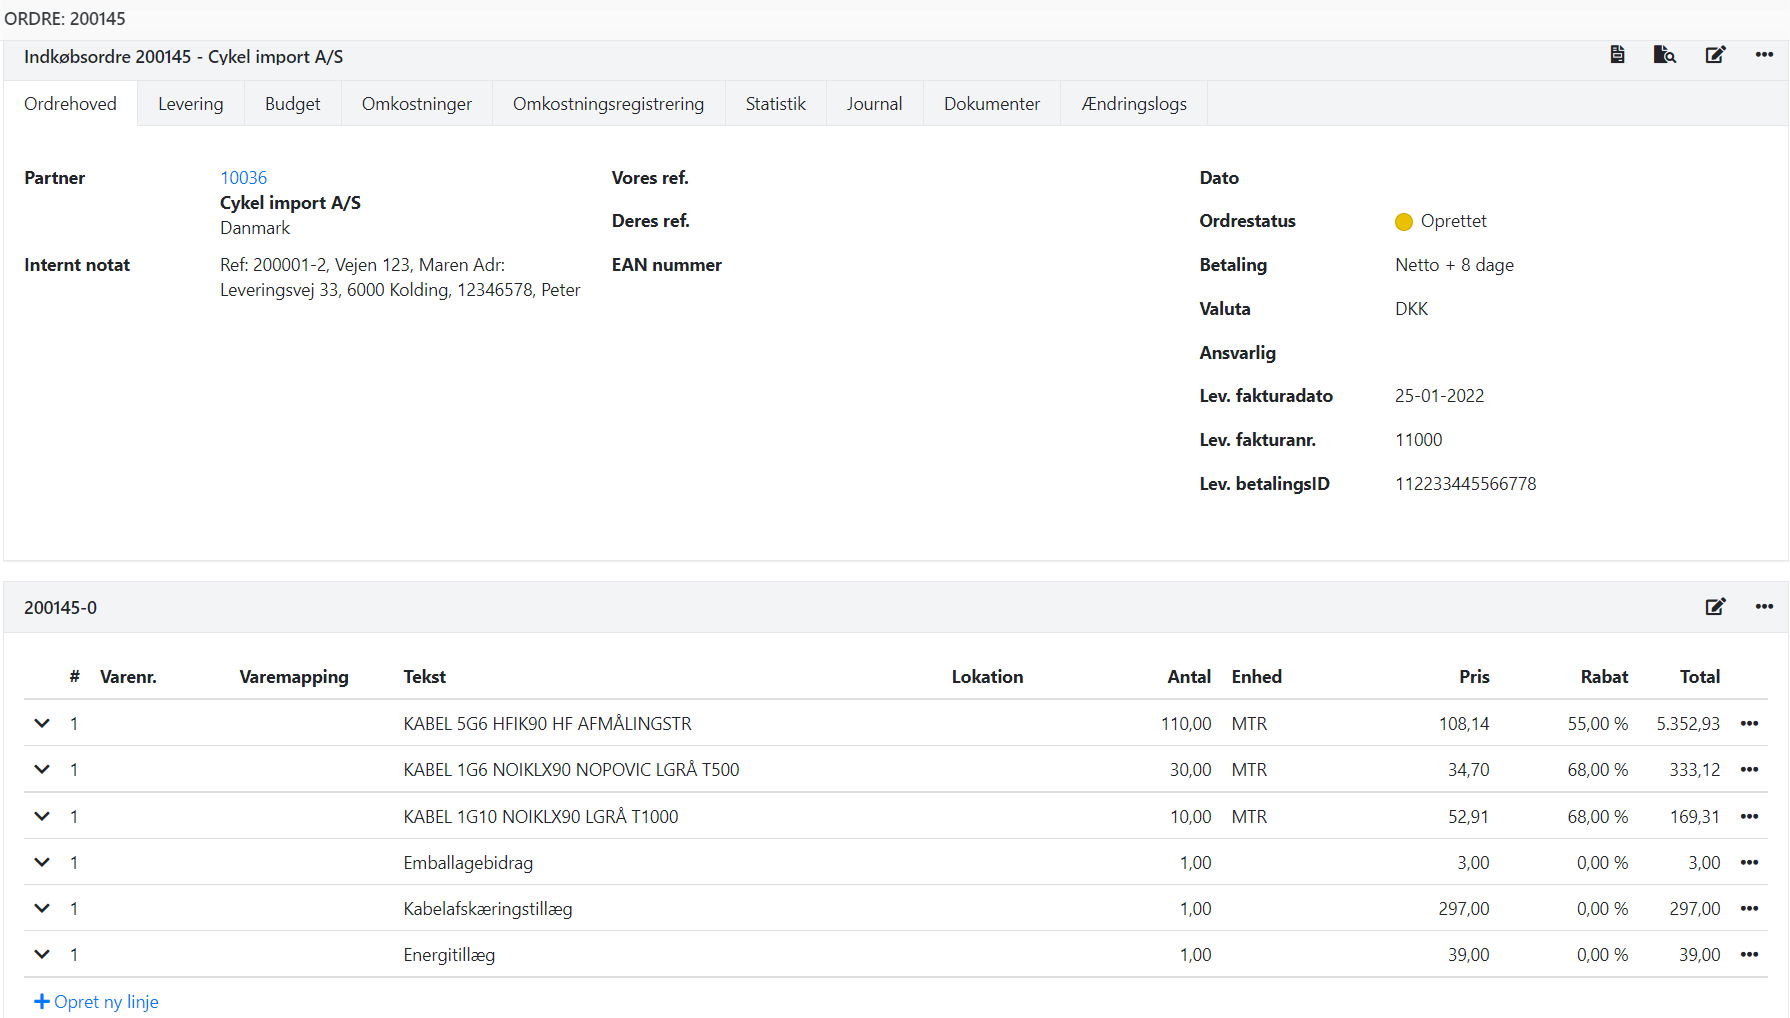
The financial part of the voucher and all invoice lines are now transferred to a purchase order. The purchase order can then be found under Purchase > Orders > Order overview and can be delivered and invoiced as usual.
Note: If you have also transferred data to a sales order (step 2.A), the cost lines will remain in voucher registration and require approval by an order responsible there.
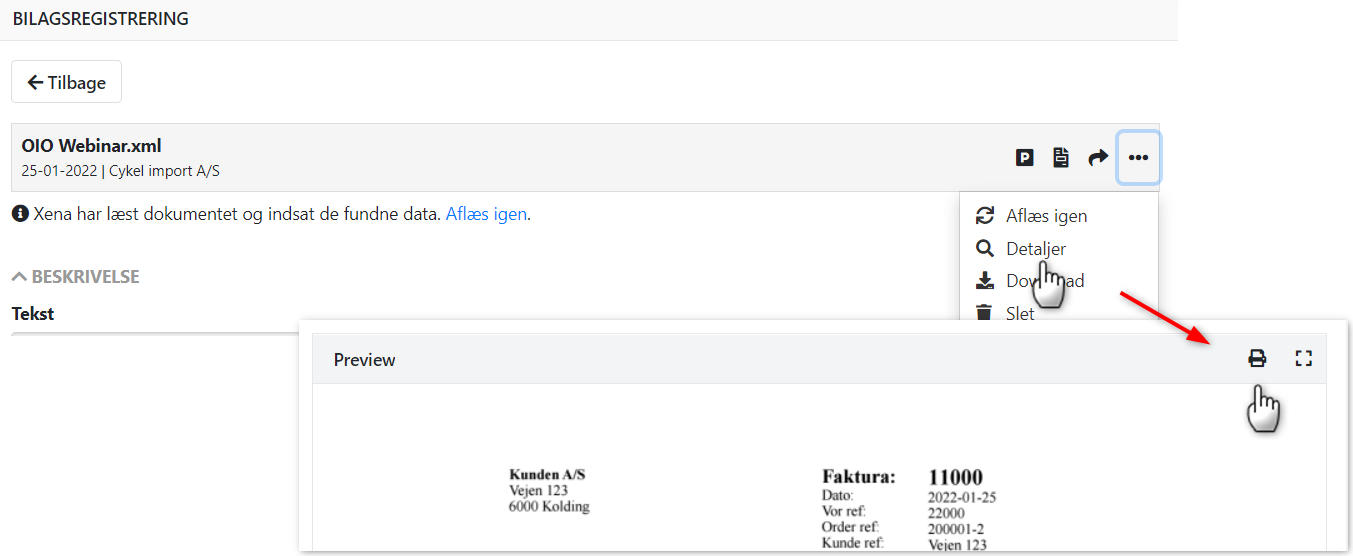
Printing an electronic invoice
Select Details in the voucher menu.
Press the print icon in the Preview box.
➡️ Read more about electronic invoices in Xena
- Updated