Stock management
With the EG Xena Stock Management app, you get simple yet complete stock management.
The app can be installed via the Xena App Store. This guide assumes it has already been installed.
Stock management should be simple – you buy five bananas and sell two, so you have three left. But anyone who has worked with stock management knows it’s not that straightforward. Stock management is actually quite complex, requiring a systematic approach and a solid understanding of how the stock functions work.
1. Get started with stock management
Stock management can be activated directly on an individual Article.
You can also define at the Article group level whether new Articles in the group should automatically have stock management enabled or disabled.
The Article’s group is very important — it determines how sales are distributed between revenue and cost of goods sold, and which account the stock value is posted to. Once a purchase or sale has been posted for an Article, the Article group cannot be changed.
➡️ Read about Article groups in Xena
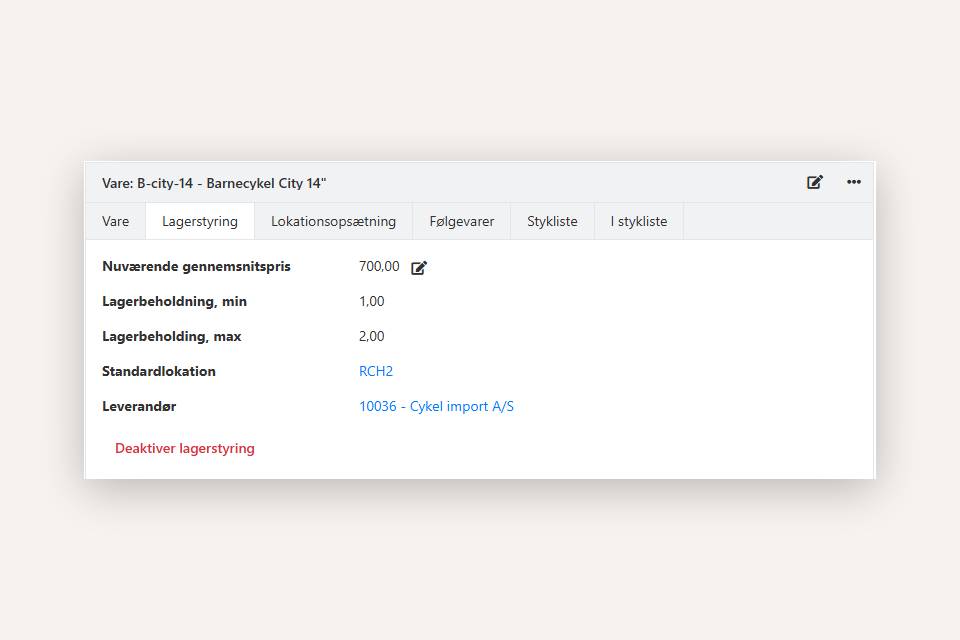
Activate stock management for an Article under the Stock management tab.

When stock management is enabled, additional fields appear on the tab:
- Current average price – system-calculated value per unit
- Stock level, min. – minimum level before reordering is needed
- Stock level, max. – target quantity to restock up to
- Default location – suggested location for purchase/sale
- Supplier – preferred supplier for the Article
2. Post opening stock
When starting stock management in Xena, you may already have Articles in stock. These opening stock values must be registered in the same screen as your financial opening entries.
How to do it:
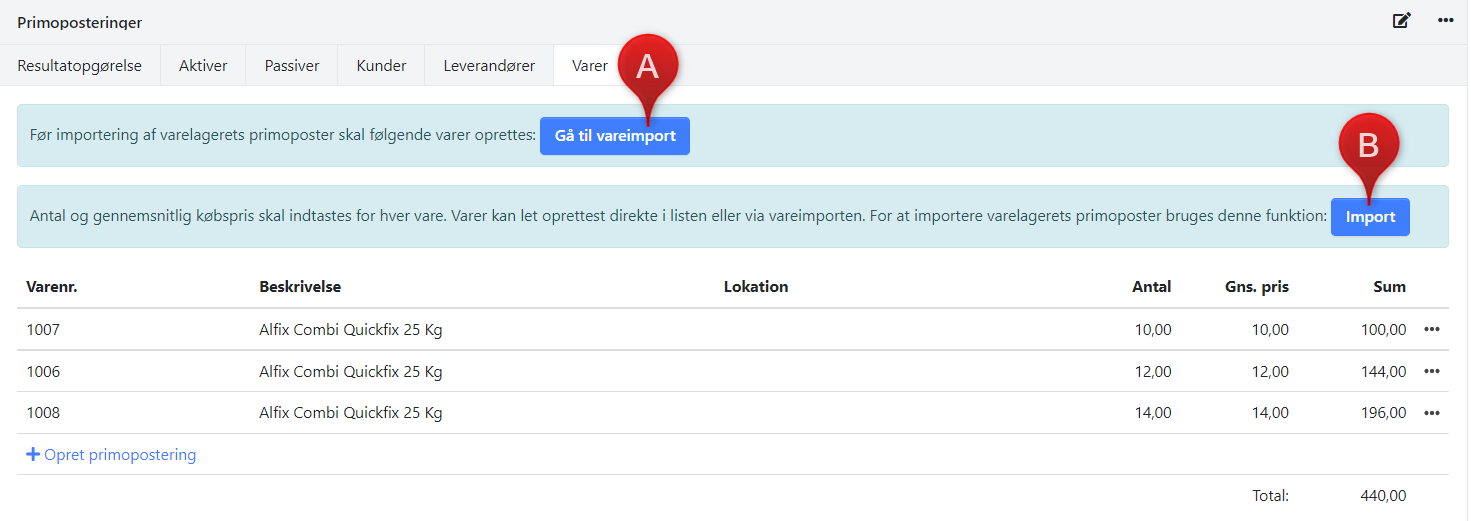
- Go to Finance > Primo posts
- Select your first fiscal year
- Under the Articles tab, enter each opening balance line by line — at minimum Article number, quantity, and average value per unit
- You can also import opening stock via CSV in two steps:
- First, import the Articles into the Article catalog
- Then import quantity and value per Article
⚠️ Note: Only import Articles that will use stock management. Articles without stock tracking must not be included — even with quantity 0.00.
The total stock value is automatically posted against equity.
Note: Minimize edits to opening entries afterward, as changes affect both the financial balance and the Article’s average price.
3. Add stock via purchase order
The standard way to add stock is through a purchase order. When you post the supplier’s invoice, the stock level automatically increases.
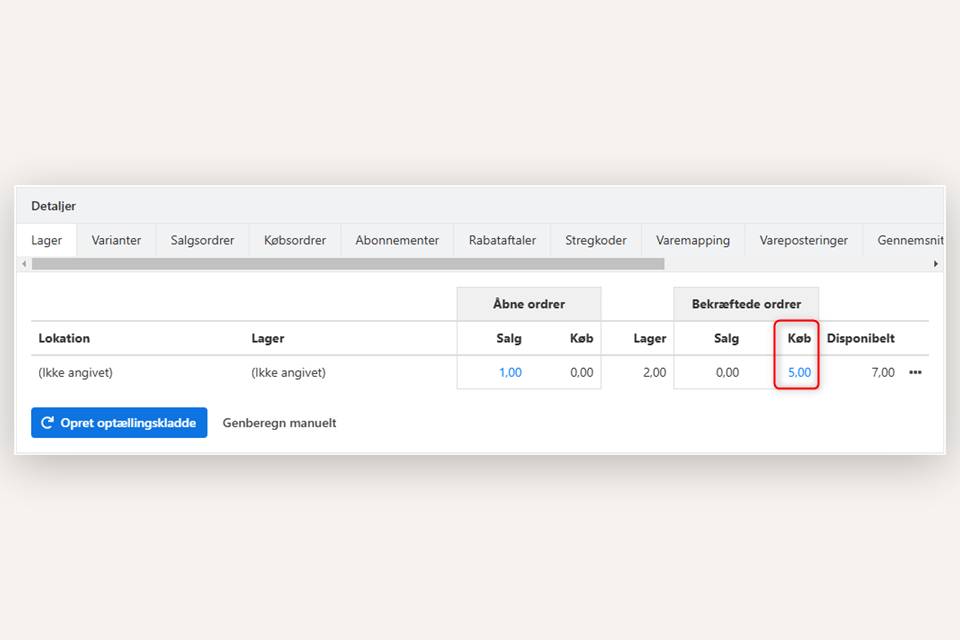
When a purchase order is created, the Articles are registered as on the way. This is displayed under the Article’s Stock tab as Confirmed orders > Purchases. These quantities are included in the function Replenish and shown on sales orders.
When you receive the goods:
- Create a delivery on the purchase order (partial deliveries allowed)
- Once posted, you can change the order status to Received
- Post the invoice when received from the supplier
⚠️ Many users choose to post the delivery together with the purchase invoice — this is generally recommended.
If the invoice only covers part of the order, you can partly invoice or use Split and Merge Order to match your received goods.
➡️ See the guide on partial delivery and partial invoicing
➡️ Learn how to use Split and Merge Order
4. Move invoice from voucher registration to purchase order
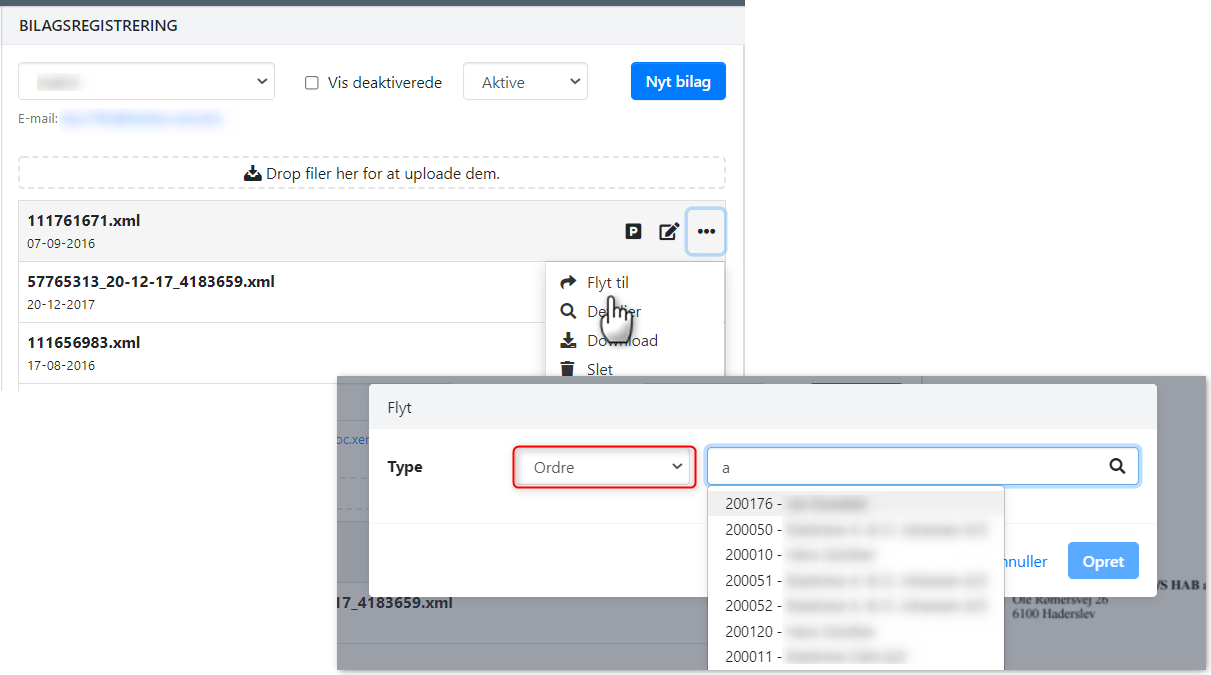
If an invoice has been received via voucher registration but a related purchase order exists, you can move it correctly:
- In voucher registration, choose Move next to the invoice
- Select type Order
- Choose the relevant purchase order
- Click Create
- Verify that the invoice appears under the Documents tab on the purchase order
- Delete the original document entry to avoid duplicate posting
⚠️ Remember: Before posting the invoice, ensure that prices and quantities match the order, and that the supplier’s invoice date, number, and payment ID are entered.
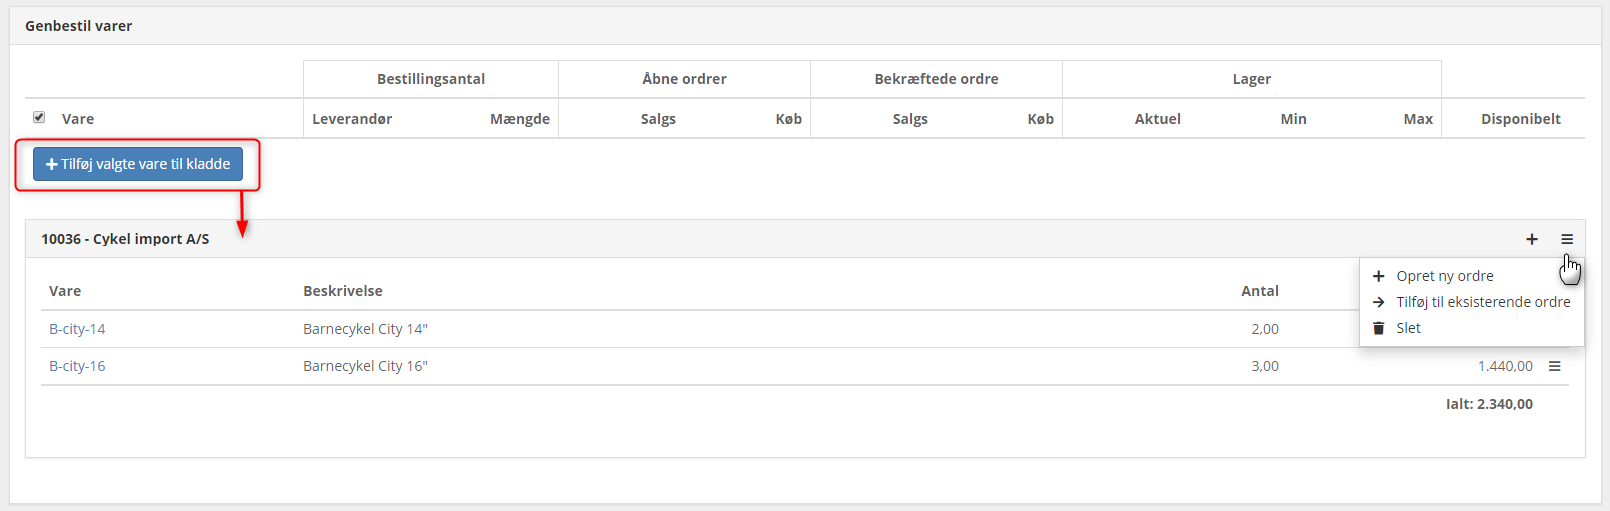
6. Replenishment
The Replenishment function (Stock > Replenish articles) suggests which Articles should be reordered. It considers both reserved and incoming Articles and automatically suggests items based on:
- Min./max. stock levels
- Sales orders missing stock
You can adjust the suggested quantity and supplier before clicking Add selected Articles to draft. You can then create a new purchase order or add the reorder lines to an existing one.
6. Locations and variants
Before you start with stock management, it’s recommended to set up locations (physical storage areas). Stock management requires structure — if your physical warehouse is disorganized, your stock management in Xena will be too.
You can move stock quantities between locations and variants at any time without affecting stock value.
- Go to the Article > Stock tab
- Click the menu (three dots) next to the stock line
- Select Specify variant/location
7. Additional help
Here are links to more guides that will help once you’ve started using stock management:
➡️ Read about Stock Count
➡️ Read more about stock and average prices
➡️ Read more about stock Value and stock balance
- Updated